Interested in how I get things done? Great! Just remember to take my advice with a grain of salt. I'm mostly a full-time high school student, so my process is probably pretty simple compared to larger webcomic creators.
Lyfaeren's Process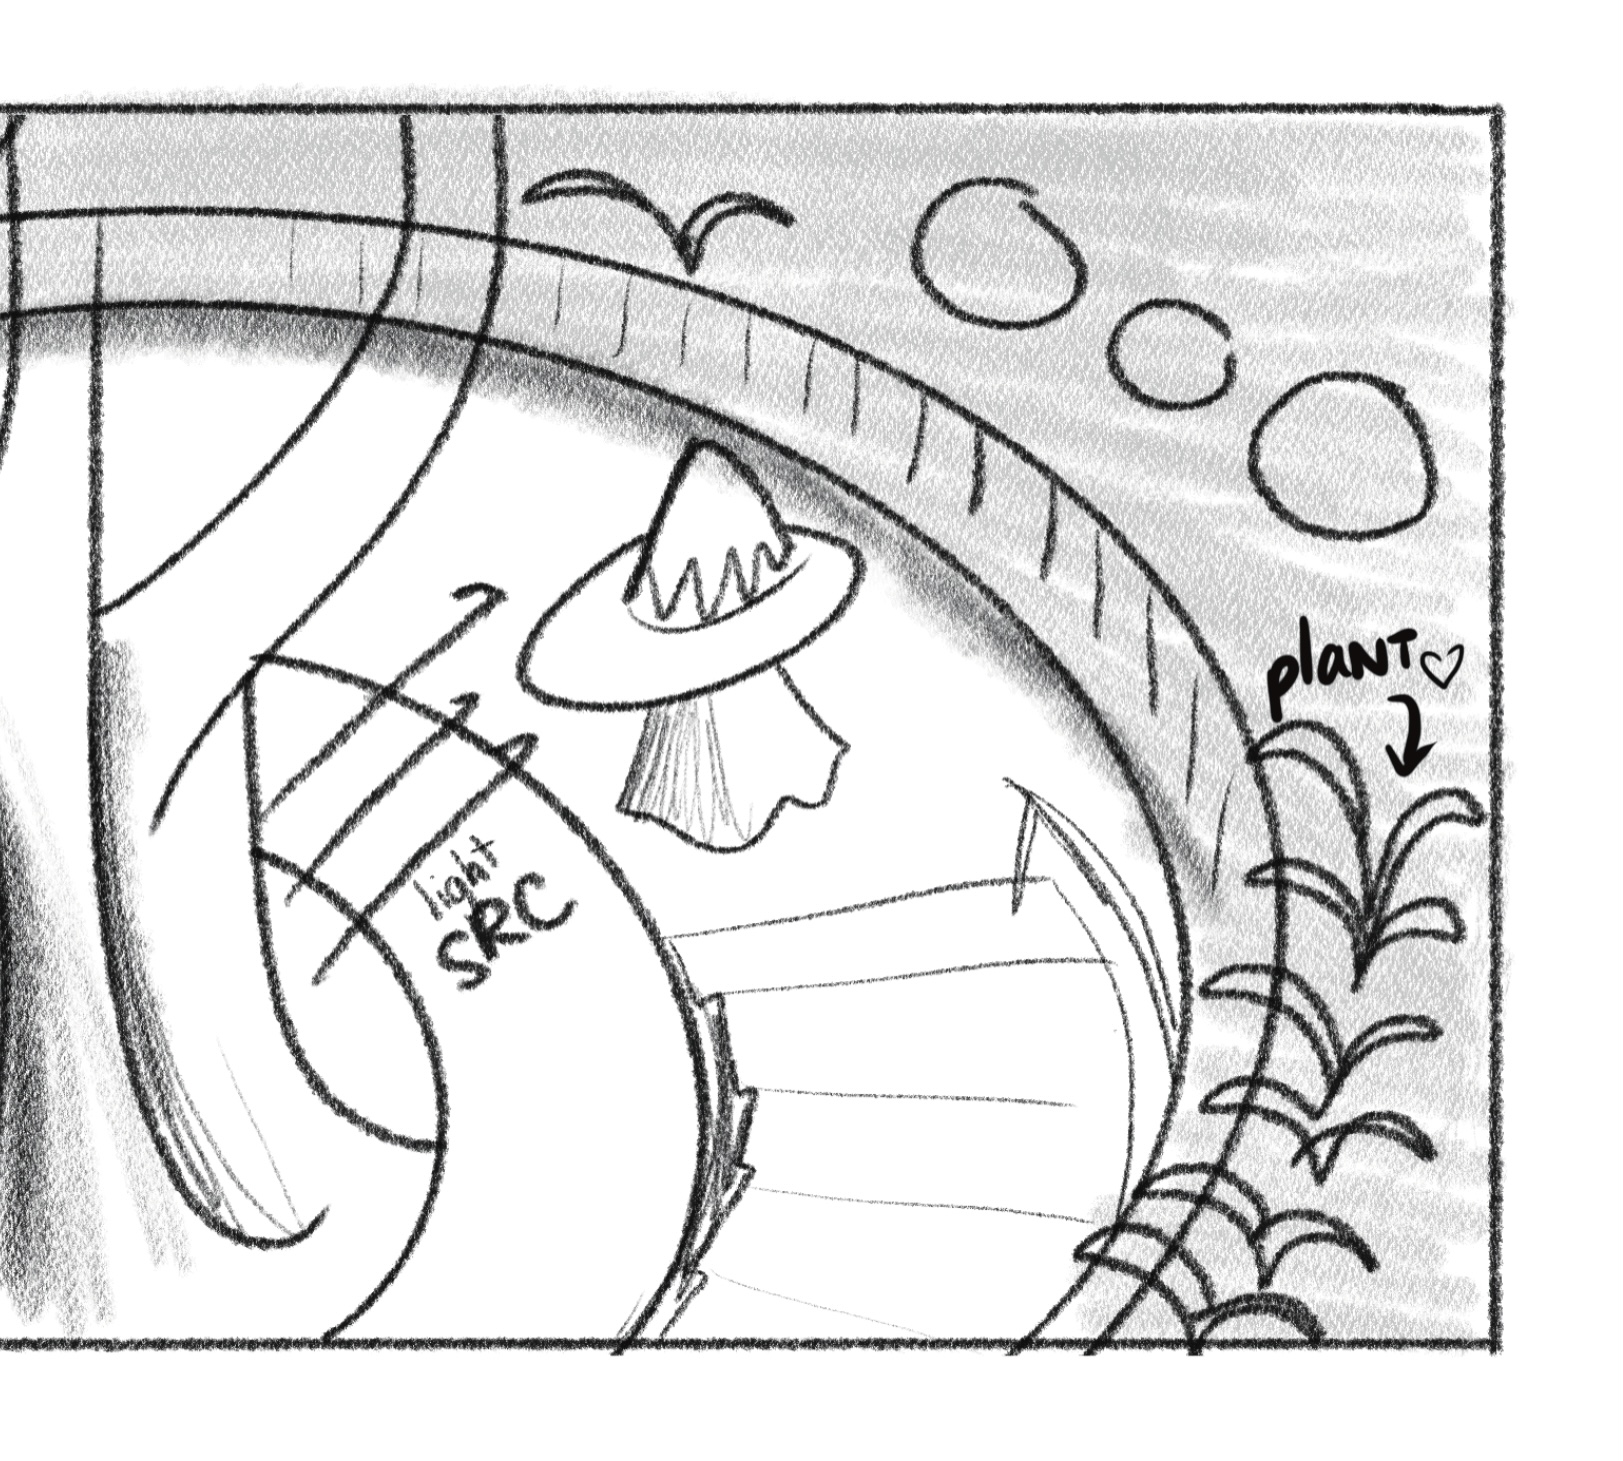
Long, long ago, when the dinosaurs roamed the Earth, I did my sketches on physical paper. Like, with a pencil. That was back when I thought I was going to make a traditional comic, not a webcomic. Now, my tree-saving plan is to do them electronically!
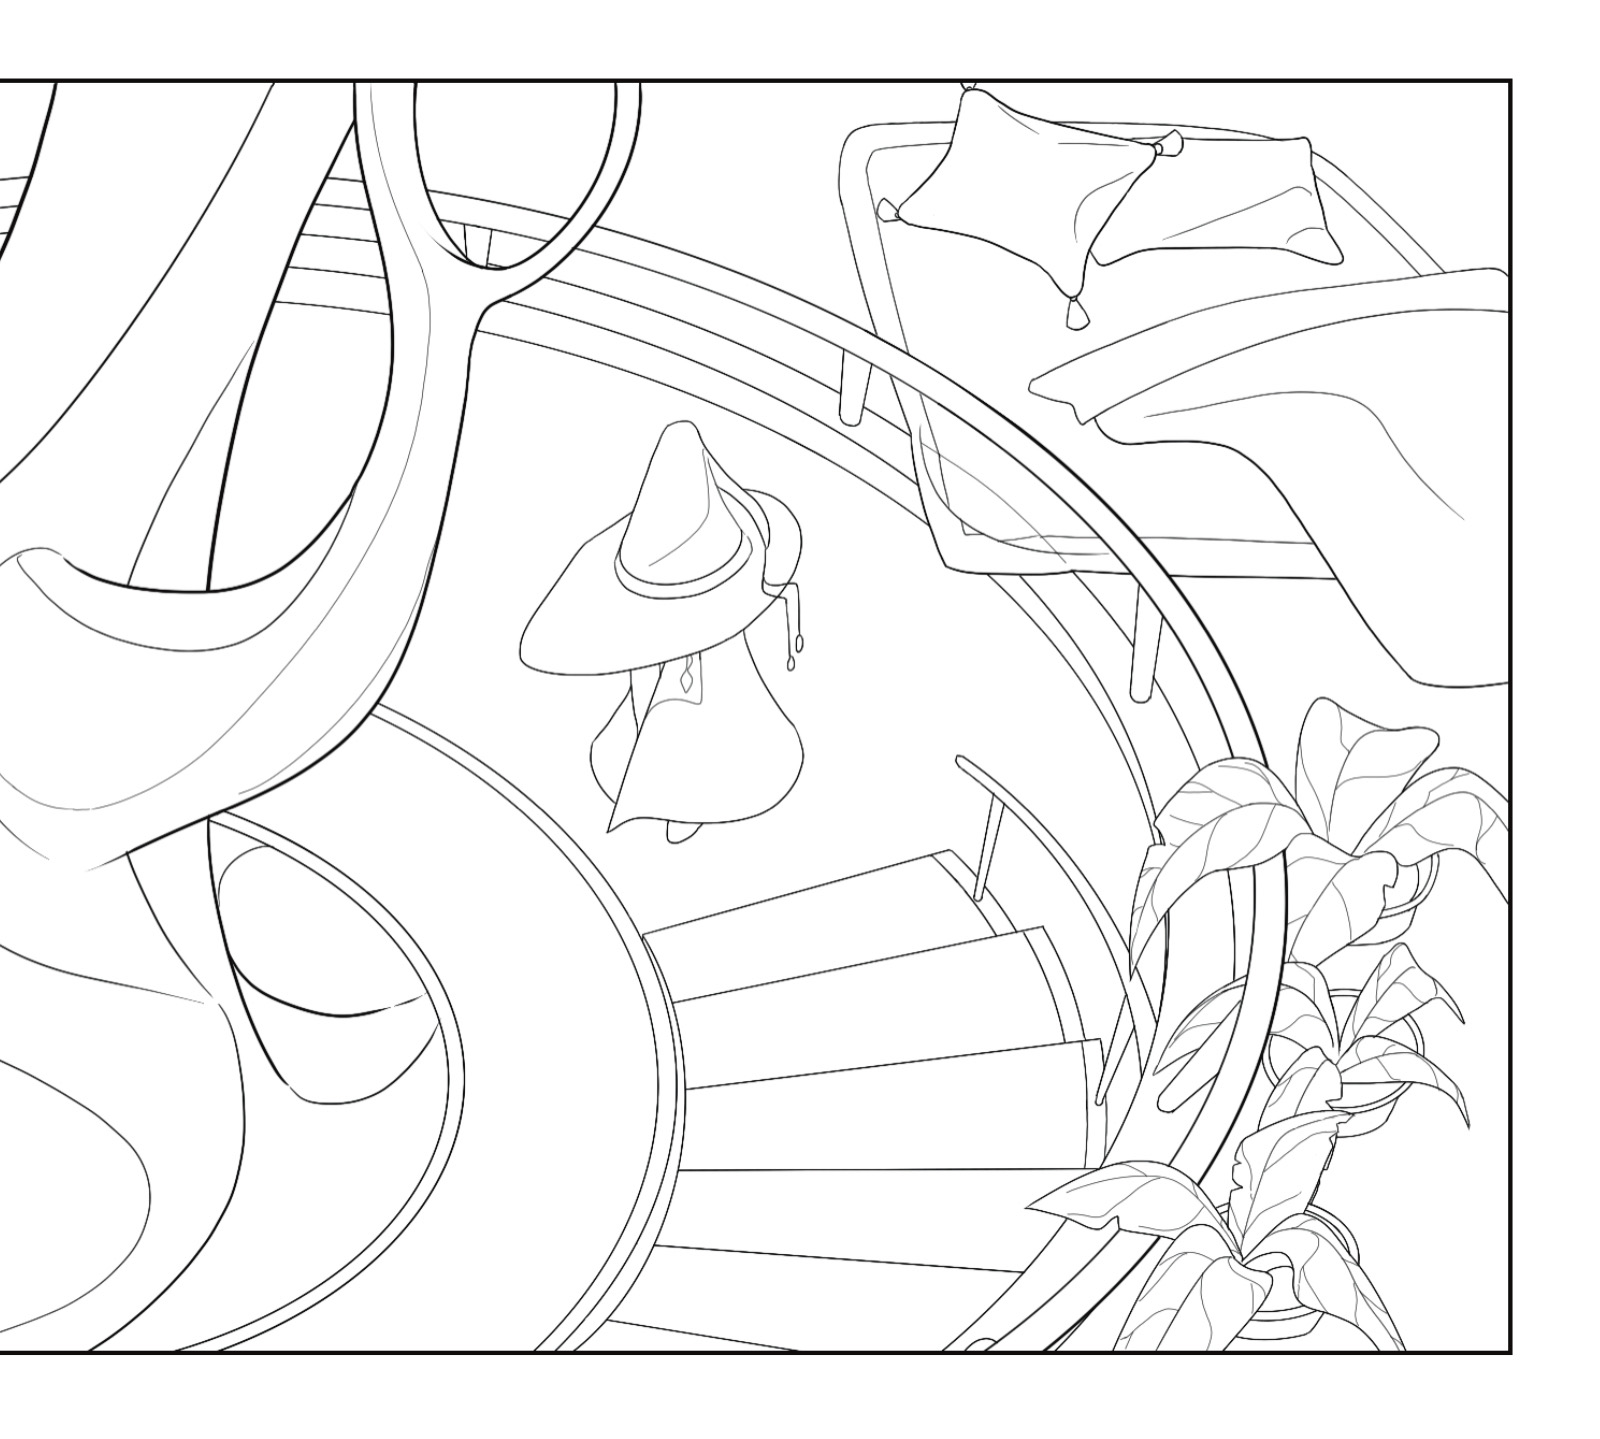
Lineart is notoriously time (and soul) consuming among many digital artists, as I have discovered on Twitter! I agree! But it's also a kind of ASMR to draw curvy, windy lines. Flowing hair. All the good stuff.
I use a brush called "Technical Pen" for lineart! When I'm tired on a school day and doing lineart, I tend to just adhere to the sketch I prepared for myself. After all, present-me has to trust past-me! But sometimes, when I have a little bit of creative juice, I deviate from the sketch! I've created some of my best stuff that way. This particular example was a pretty close match to its sketch, but I'm telling you, sometimes I don't even follow the panel shapes I conceived in the beginning. As an overthinker, my lineart can take up to 6 hours.
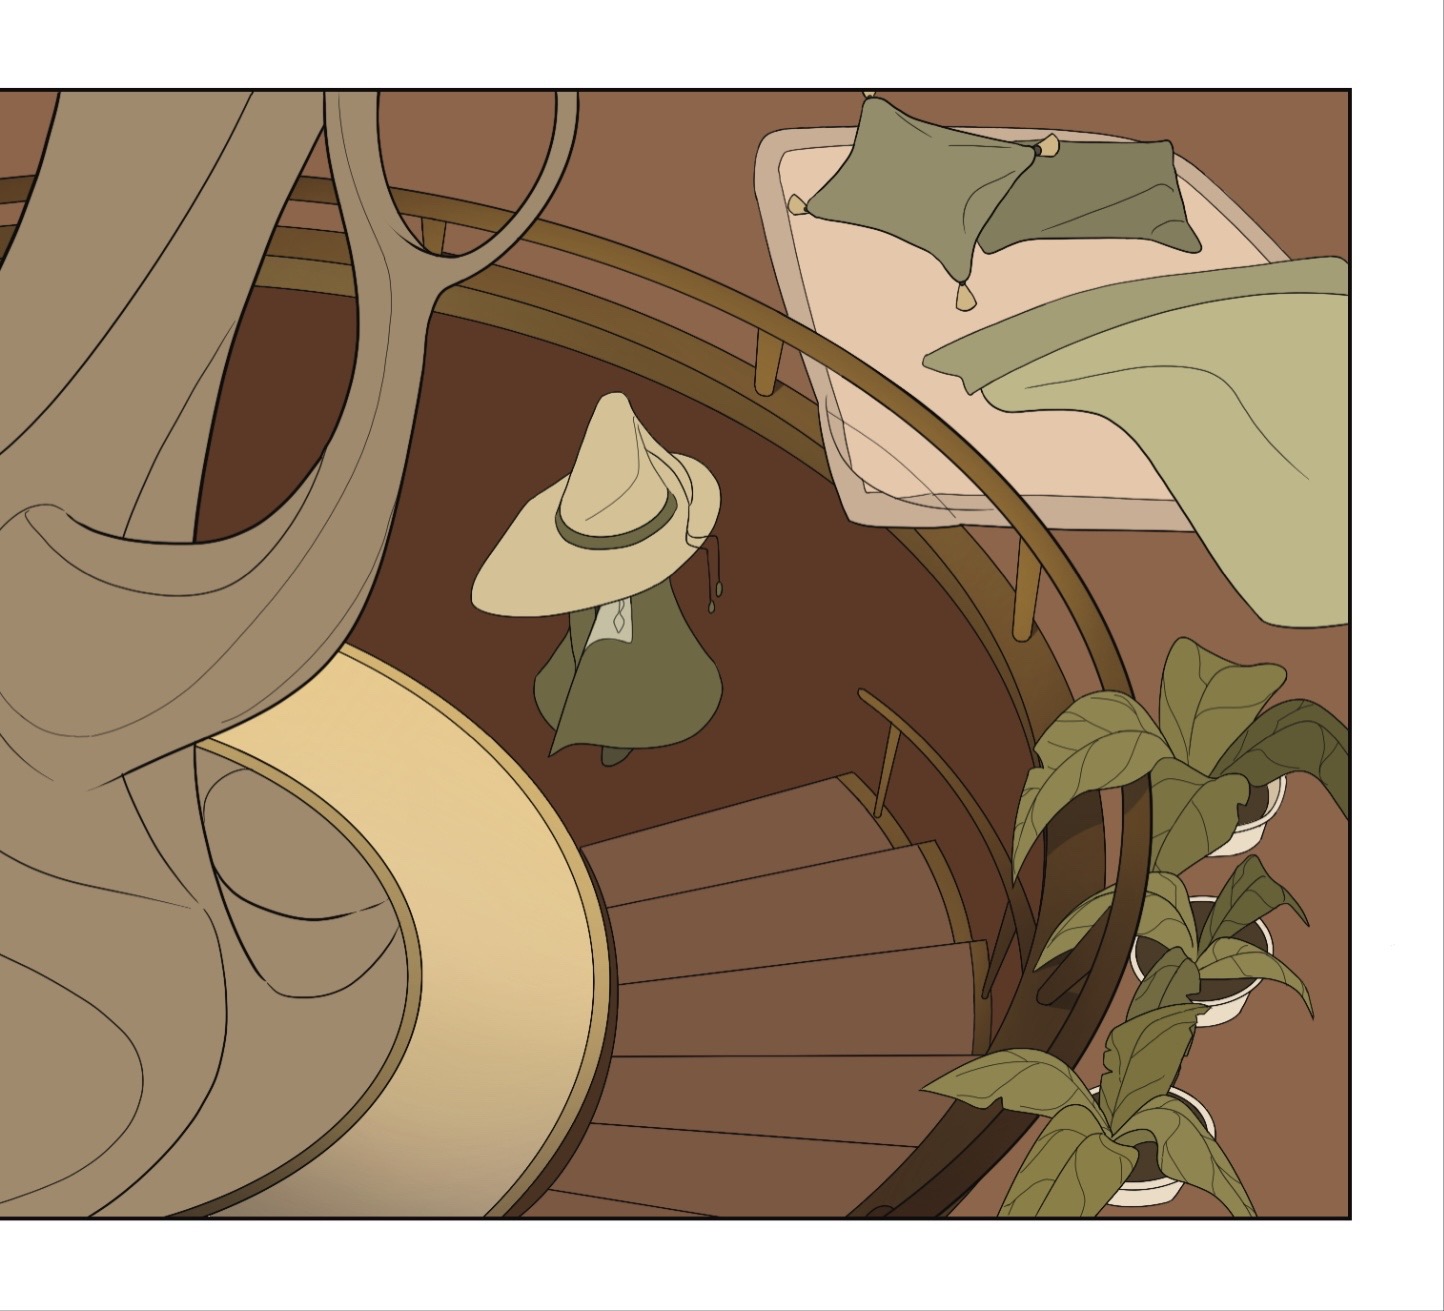
How do I keep things consistent? Procreate allows me to create a customized color palette into which I input all the hair, clothing, etc. colors. Now, the actual coloring is quite simple: I create separate layers named Skin, Hair, Clothing, Accessories, Wall, Floor, and Props. In that order.
And how do I avoid the dreaded white spaces? To be honest, I don't have a technique for that other than "if I don't find it now, I'll find it later, and if I don't find it later, I'll cross my fingers and hope no one else does."
By rendering I basically mean airbrushing and shading. This creates a 3D illusion to complement my cartoonish lineart. For my artstyle, I use the brush "Soft Airbrush" primarily for bright colors and light. Meanwhile, I use a low-opacity "Technical Pen" and 1-4% Gaussian Blur to create a shadow effect. These go on two different clipped layers atop each coloring layer that I made on Step #3.
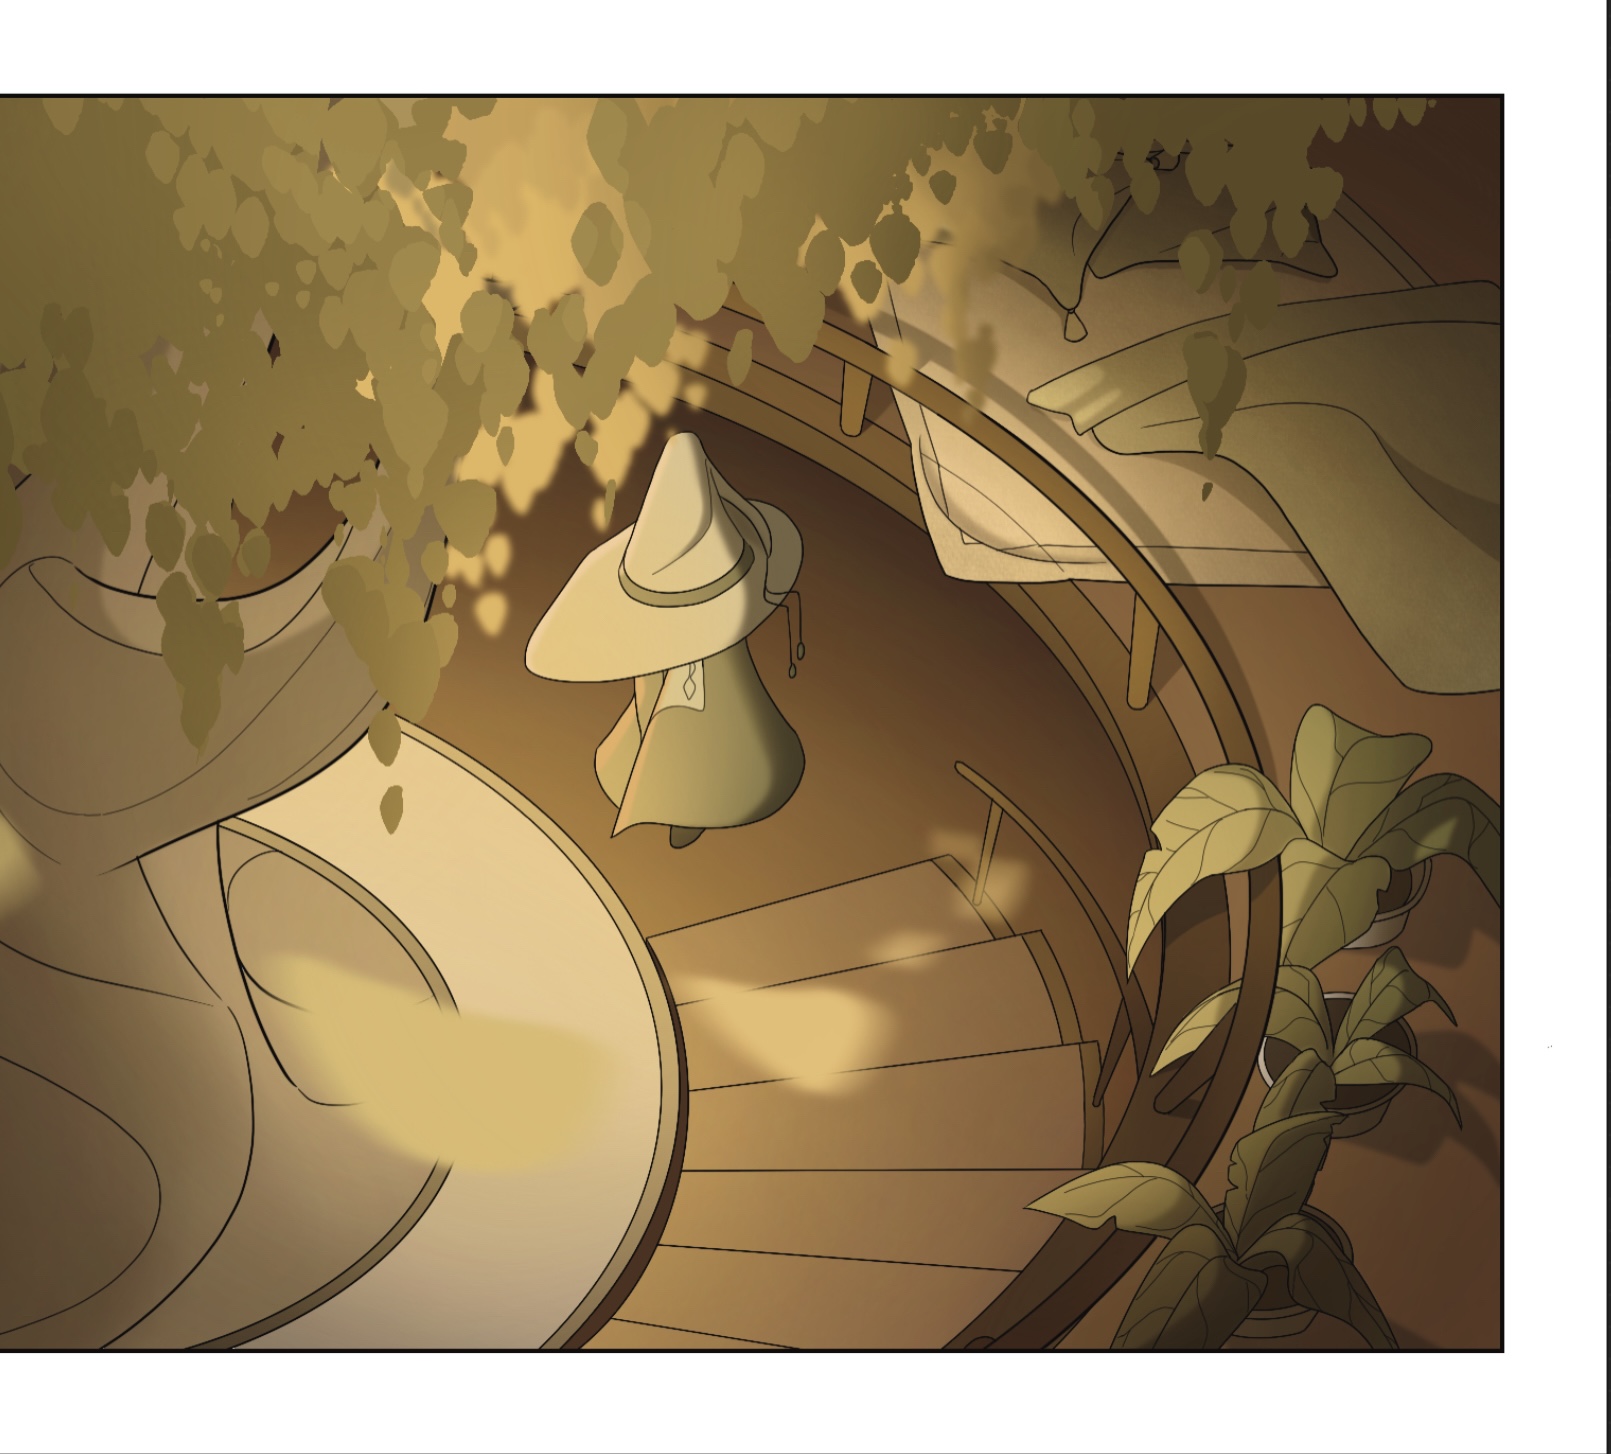
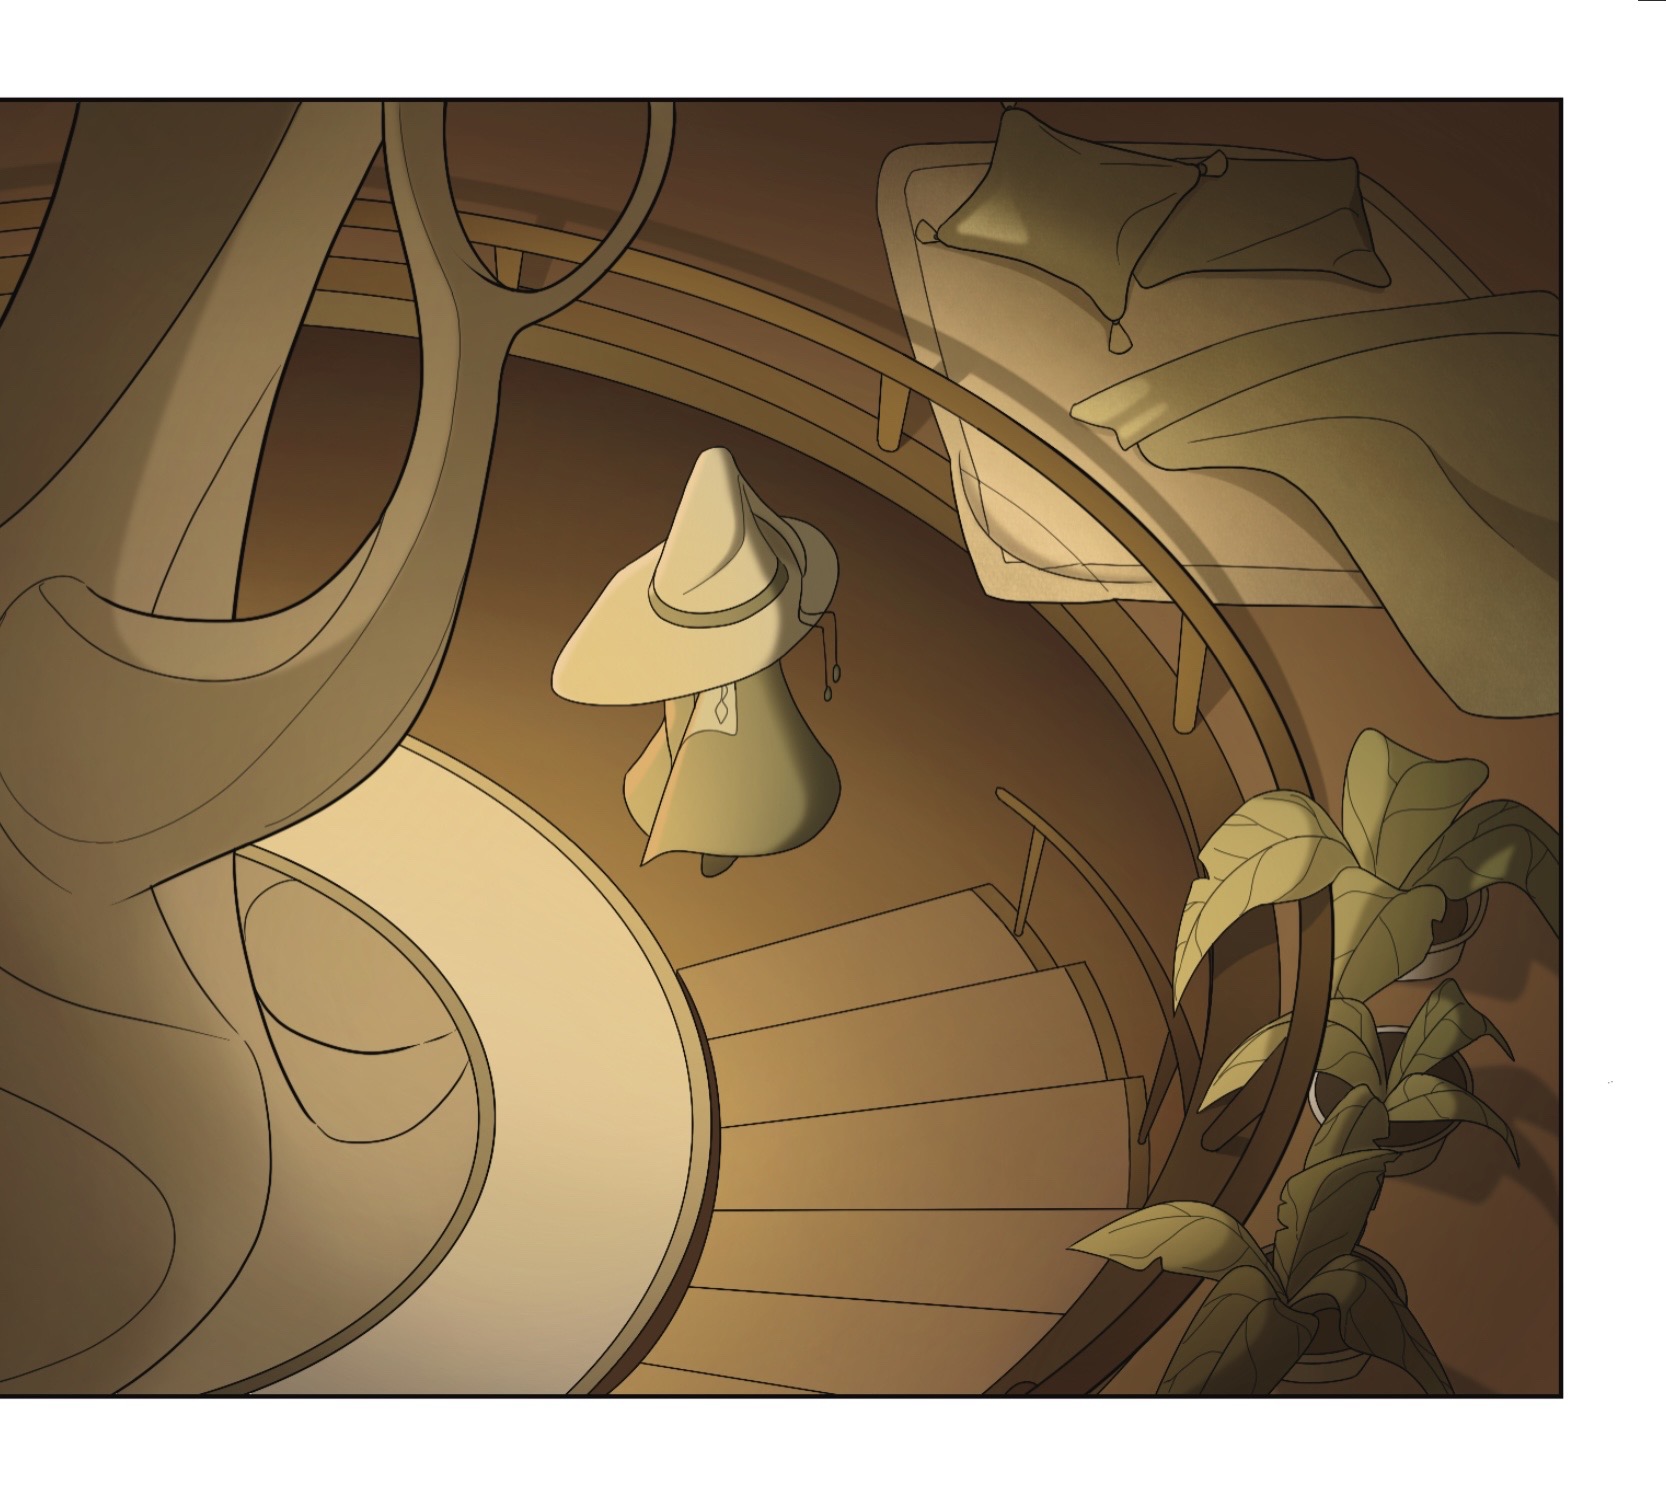
My webcomic's about magical battles and luscious forest leaves, so I often add some final touches over the lineart! While it's the shortest part of the process, it's often the most rewarding. It can add depth and motion to what would otherwise be a static scene. Comic art often portrays action, and this can be done with Motion Blur, Gaussian Blur, etc. In this example, I've got some leaves hanging from a willow tree and a flurry of them whooshing nearby!
As for the dialogue bubbles, which are not present in this example, I usually draw them with the thinnest possible brush. I use the Predictive Stroke function on Procreate for the circles because I cannot draw an aesthetically pleasing circle for my life. Funny thing, it took me two months to find out about Predictive Stroke, and the struggle was real.
And that's pretty much it for this magical scene in Chapter 3: Page 2! Go check it out!